Heroku
Get Started
There's a high chance you would want to put your API on the internet, to do that you have to deploy it somewhere. In this guide you'll learn how to configure runtyme-kit to automatically create an environment for you. You'll also learn how to use already defined CI/CD pipeline to deploy newest version of your API.
How to get API Key
First, you must create Heroku account and attach your payment details.
Otherwise, you might encounter an error on apply, that says you cannot create the resource.
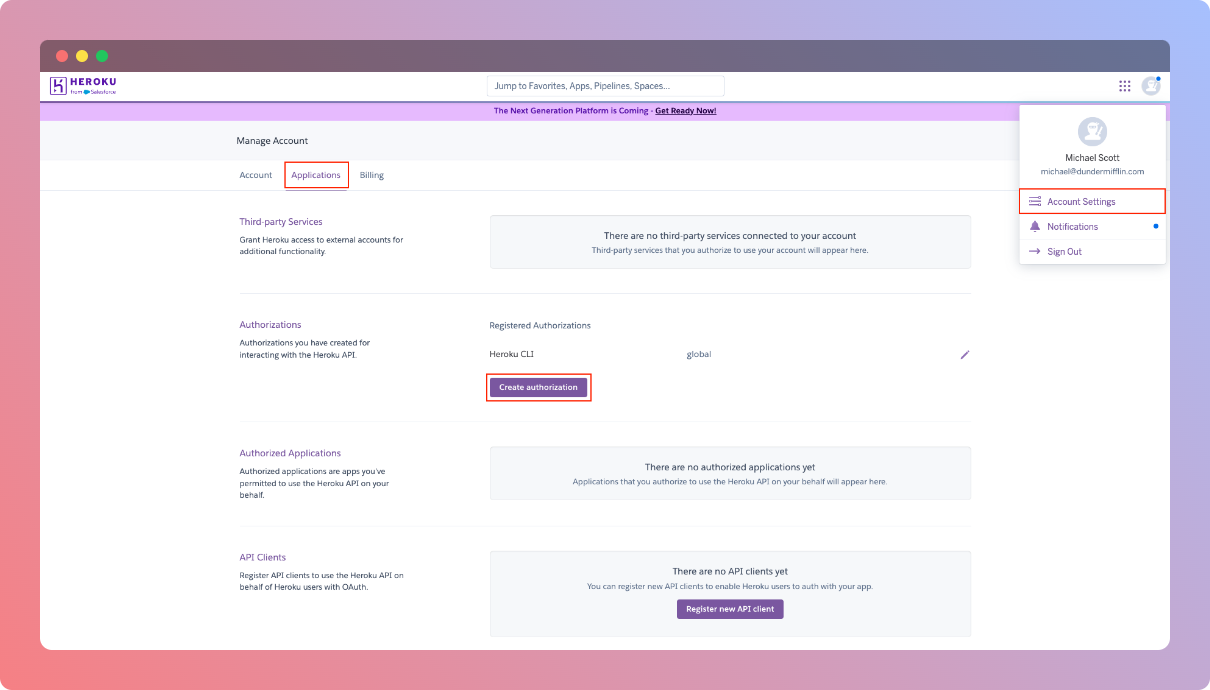
To get Heroku's API Key you need to log into the dashboard, click on your user's icon on the top right of your screen, choose Account Settings and pick Applications tab or use this link.
There, you will find Authorizations section, where you need to click Create authorization button. It'll open a prompt on your screen asking for API key description. When you name it, just click Create. You don't have to provide expiration time.
Integrate with GitHub Actions
To use Heroku with runtyme-kit automated way, we'll have to add specific secret values in your project's GitHub repository, so GitHub Actions runner can pick them up and perform infrastructure updates on those specific resources.
To add secrets to your GitHub repository, go to repository's Settings->Secrets and variables->Actions, under Secrets tab, click New repository secret button.
Following secrets must be added:
TF_VAR_HEROKU_API_KEY- Use value fromHow to get API Keystep.
Enable __env.tf
To enable Heroku in __env.tf file you need to:
- switch
heroku.enabledflag totrue - pick your app's name a populate
heroku.app_namewith it's value (this will be the name of the app in Heroku) - optionally, select a
heroku.regionon which the app will be deployed, default:eu - optionally, select a
heroku.dyno_tierfor your app according to your needs, default:basic - pick how many
heroku.replicasof your app should be deployed, default:1 - specify what
heroku.buildpacksyou would like to use within your app in Heroku, default:[]- Heroku can automatically detect what buildpacks are needed based on files in your source code
When you enable Heroku, the CI/CD apply workflow might take longer than usual, any changes after that should be executed in usual time period.
What's the URL of my API?
If you have cloudflare.enabled set to false, domain.root and domain.sub.api is unspecified, you'll find your API's URL in Heroku Dashboard.
Otherwise, the URL should be https://<domain.sub.api>.<domain.root>/, for example:
domain.root    = 'api'
domain.sub.api = 'example.com'

=> url = https://api.example.com/
Automatic CI/CD
To get automatic deployments we need to connect Heroku to your project's repository. If you haven't connected Heroku to your GitHub account before, you'll be doing that first.
-
First you need to find your application in
productionpipeline, underDeploytab you should seeConnect to GitHubbutton, click it, you'll be guided by Heroku what to do next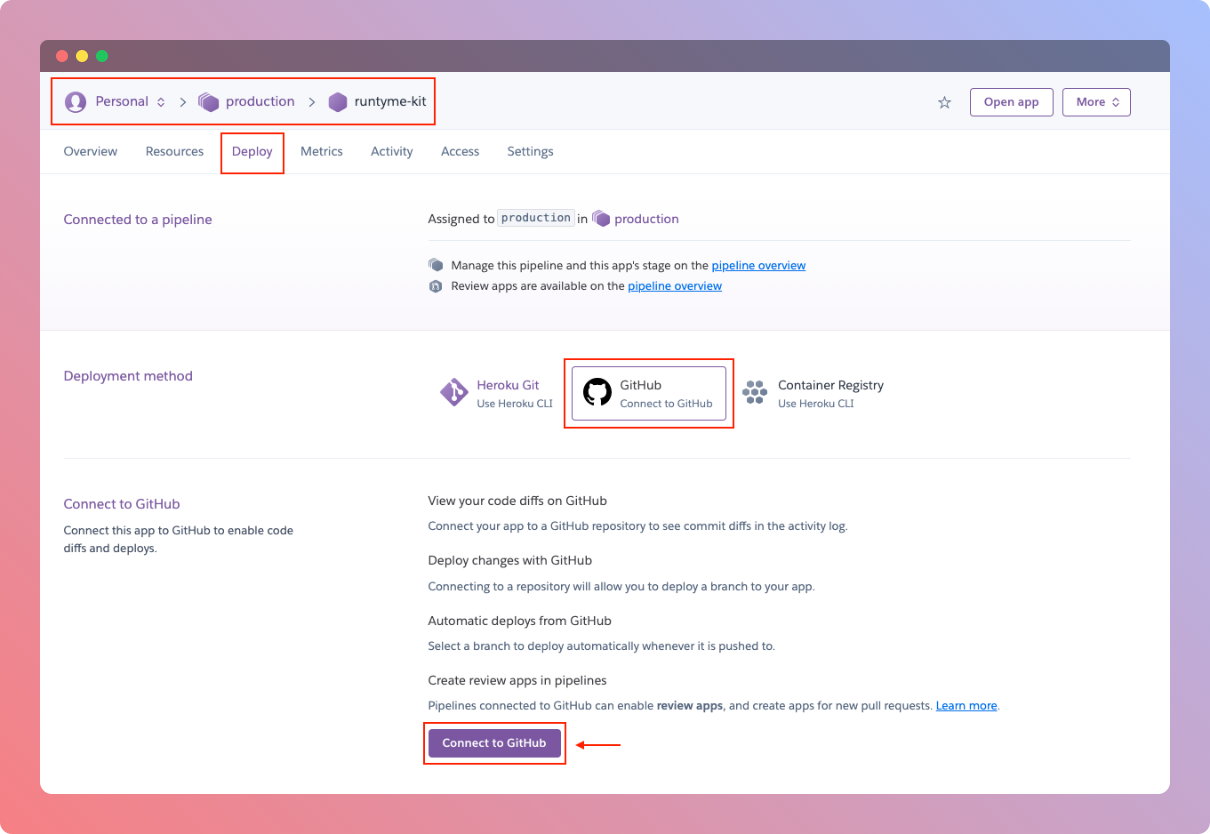
-
When you authenticate Heroku to your GitHub account, you'll see (in the same
Deploytab) a search bar where you'll search to your app's GitHub repository -
If it exists, you should see it below that search bar, click
Connectbutton that's on the right side of the repository you're looking for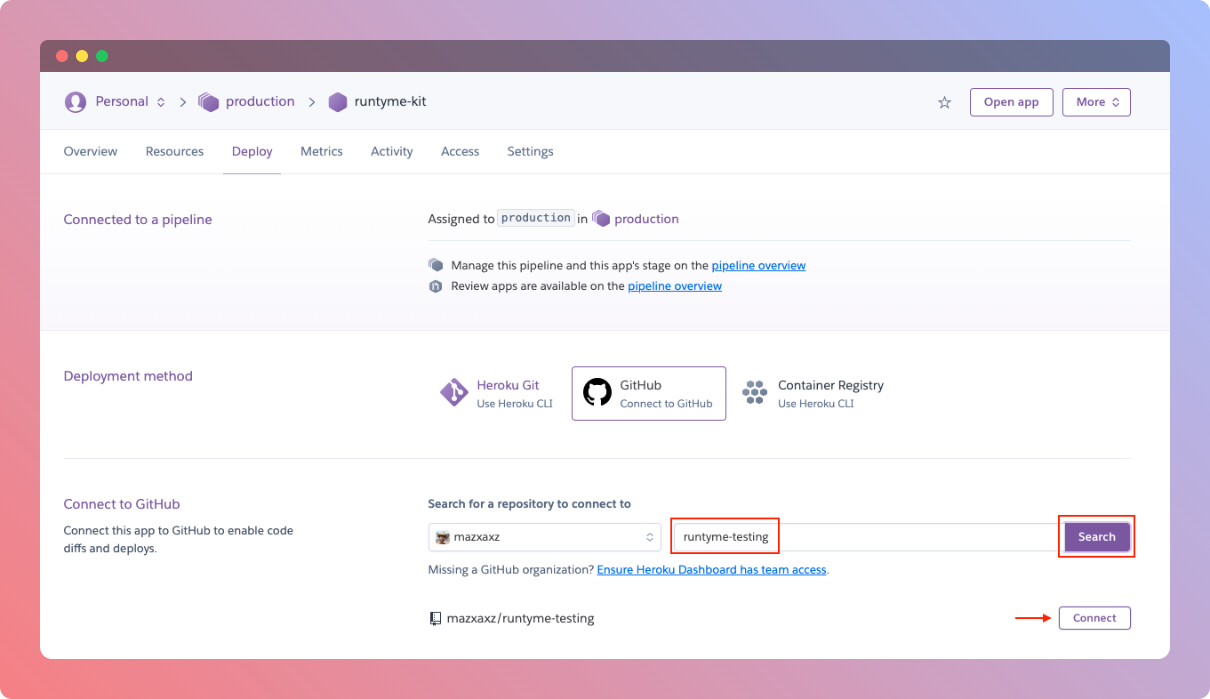
-
When connected, you need to choose branch of your repository from which every commit will be automatically deployed to you Heroku instance
-
Optionally, check
Wait for GitHub checks to pass before deploy -
Finally, click
Enable Automatic Deploysbutton and voila! We're all set!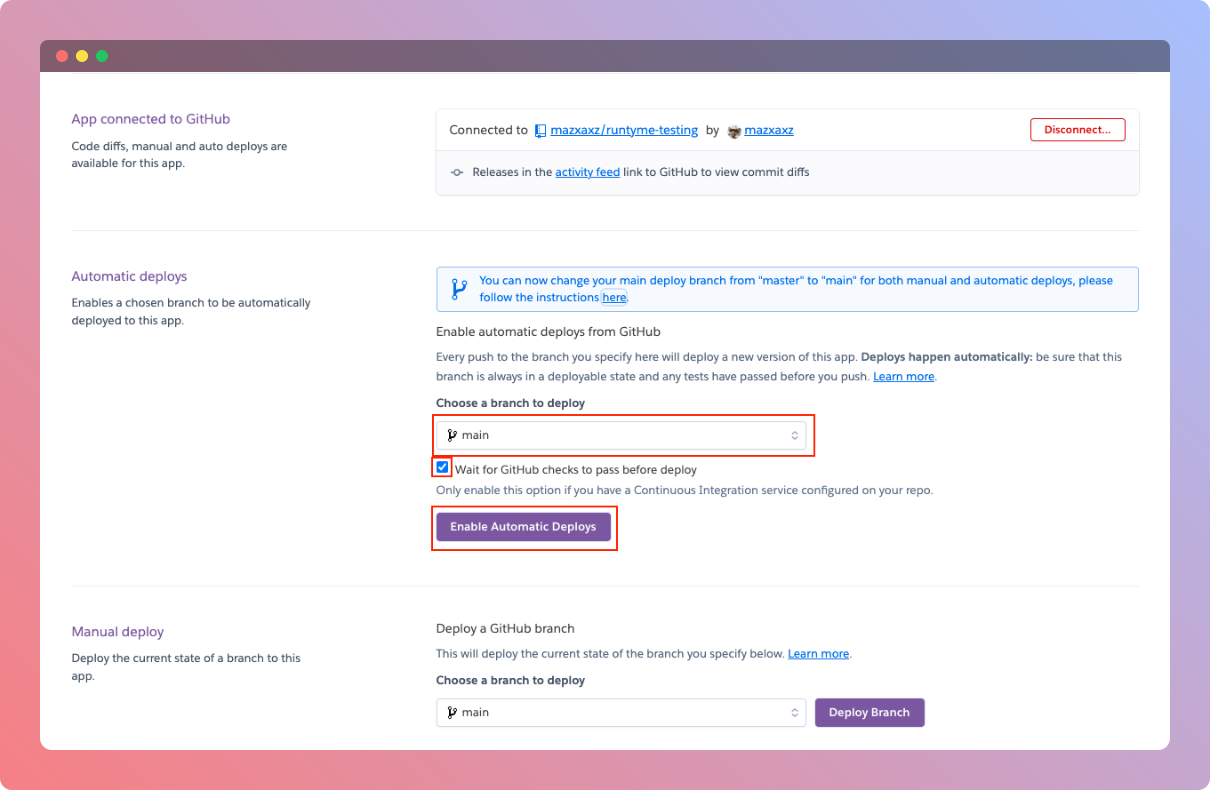
Reference
locals {
    ...
    heroku = {
        enabled = false
        // (required) Name of deployed API that will be visible in Heroku dashboard
        app_name = "runtyme-kit"
        // (optional) Heroku region on which API will be deployed
        // Available values: https://devcenter.heroku.com/articles/regions
        // default: 'eu'
        region = "eu"
        // (optional) Number to replicas count of deployed API
        // default: 1
        replicas = 1
        // (optional) Dyno type of deployed API
        // Available values: https://devcenter.heroku.com/articles/dyno-types
        // default: 'basic'
        dyno_tier = "basic"
        // (optional) List of buildpacks supported by Heroku, which should be used on your API instance container
        // supported buildpacks: https://devcenter.heroku.com/articles/officially-supported-buildpacks
        buildpacks = [
            "heroku/go"
        ]
    }
    ...
}