Supabase
Supabase platform gives us possibility to host Postgres instance on free tier, hence it could be one of the possible optimal solutions for Terraform state management.
It is important to keep in mind that free tier Supabase organization keeps your project alive only if it was used within last 7 days! It means that your infrastructure state might be deleted if you don't perform any operations in that project.
Create Postgres instance
First, if you don't have it already, you need to create Supabase account.
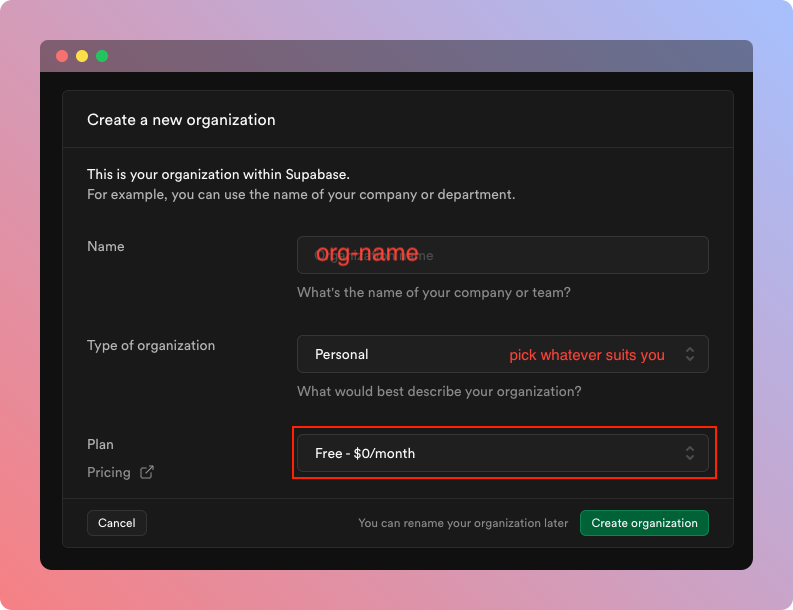
(optional) New organization
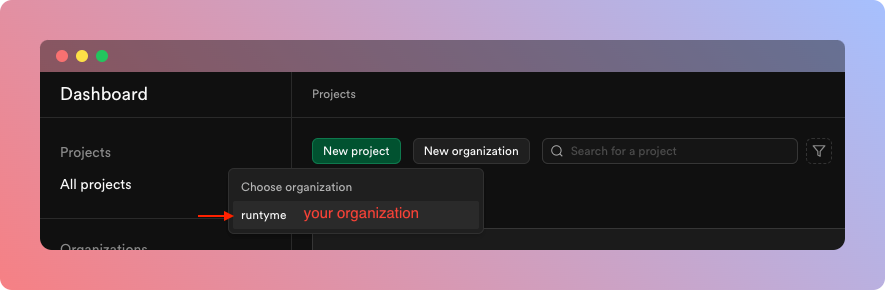
If you don't have an Organization already or want to have this project under new Organization you need to navigate to your Projects dashboard and click Create organization button.
Create new project for infrastructure
Go to your Projects dashboard and click New project.
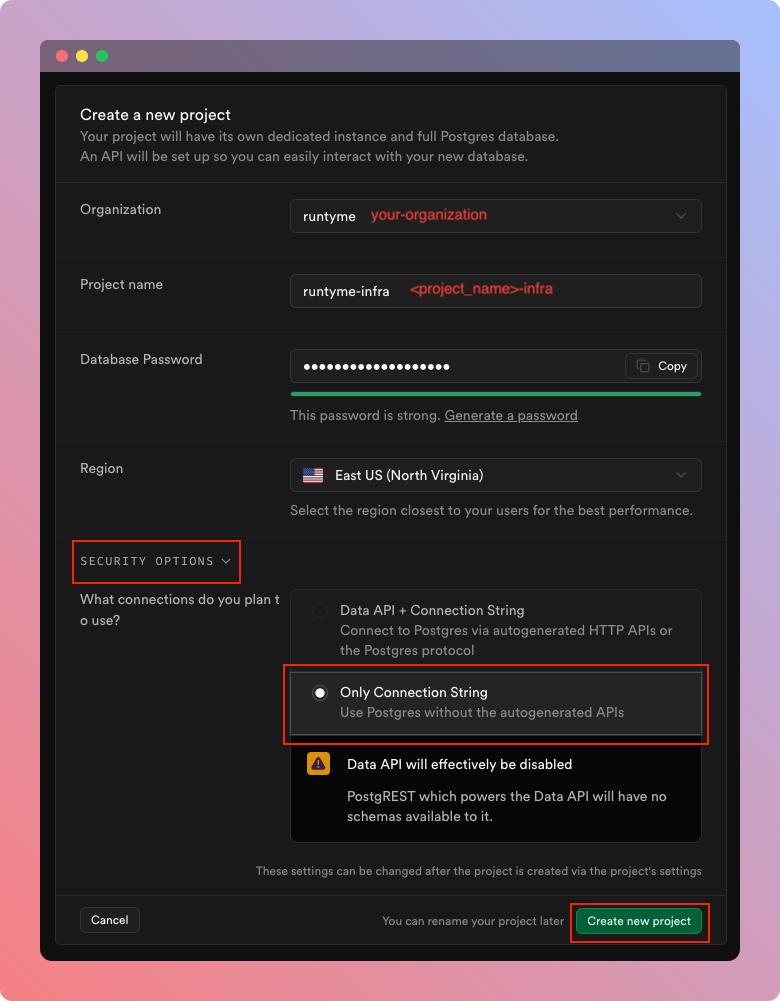
Supabase will ask you about the project settings, you need to:
- Pick a name for the project with
-infrasuffix, for exampleruntyme-infra - Generate Database password
Save this password in a secure note, you'll need it later
- Pick a region which suits your case best
- Expand
Security optionstab and chooseOnly Connection Stringoption (we only need Postgres instance) - Click
Create new projectbutton
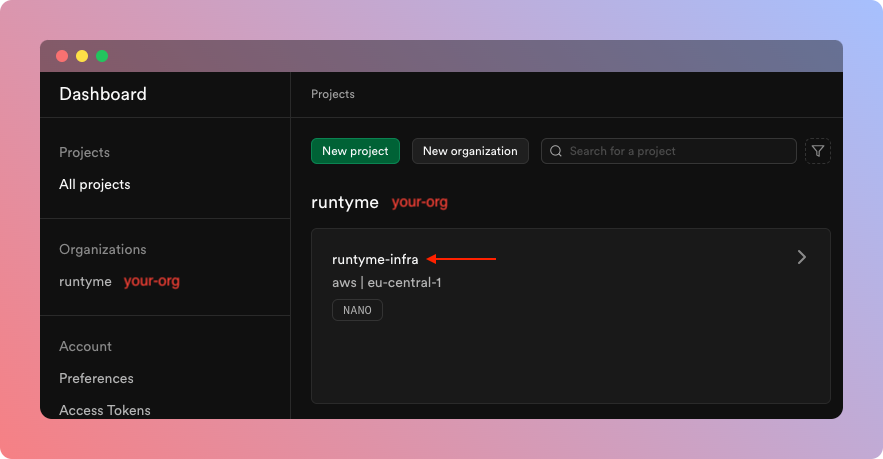
Wait until Supabase creates your Project (can take up to 5 minutes), voila!
Supabase access management is handled by RLS (Row Level Security) to secure your data within your Supabase instance. This configuration is manual, so make sure you check this guide and secure your database properly.
Configure GitHub actions
To configure your GitHub Actions workflow in order to properly manage your infrastructure's state, you need to go to your Supabase's Projects dashboard and pick infrastructure project created in previous step.
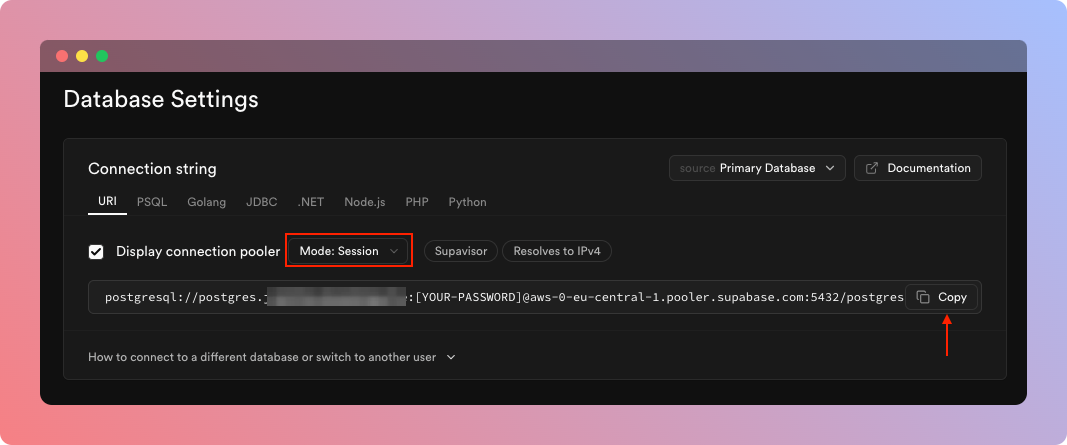
After that, go to Project Settings on the bottom of the side bar and click Database tab under Configuration section.
You need to find Database connection string URI, switch mode to Session and click Copy button.
When you copy database connection string URI, you can navigate to your GitHub repository, where you plan to use runtyme-kit.
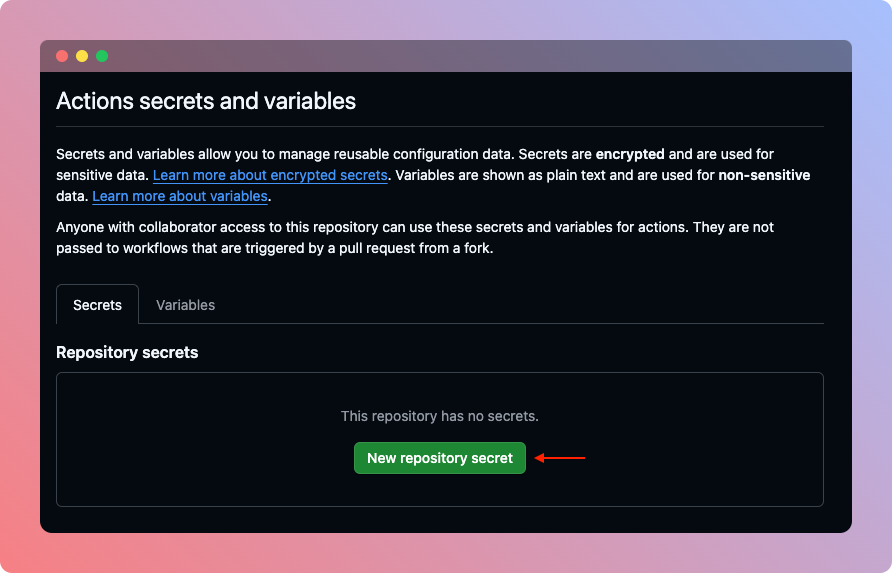
In repository, go to Settings tab, under Security section, find Secrets and variables->Actions.
In Secrets tab, click New repository secret button.
Secret must be named TF_BACKEND_PG_CONN_STR and the value should be the Database connection string URI you have copied.
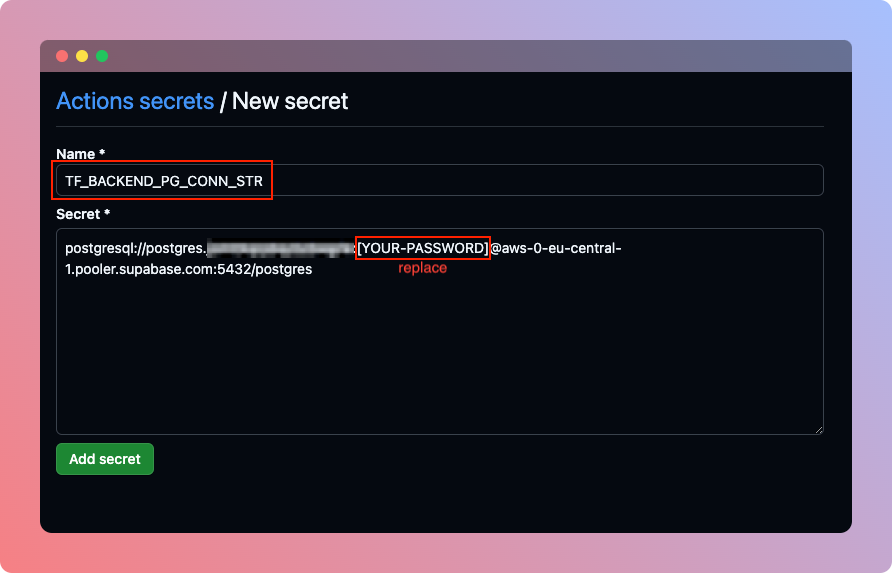
Make sure ...[YOUR-PASSWORD]... string is replaced with your database password defined when Supabase project was created in previous section