Cloudflare
Get started
In this module, we'll enable Cloudflare Gateway with out of the box security configuration and we'll configure CORS.
As a prerequisite you need to have an Account and registered Domain on Cloudflare, you can either follow Domain module or those guides:
When you're done with that, we'll need to acquire Cloudflare's:
API token- your personal Account's access token, will be used by GitHub Actions of your project's repository to apply configuration changes.Zone ID- Zone is like your Domain's space, this will point runner to apply configuration in the right place.
How to get API Token?
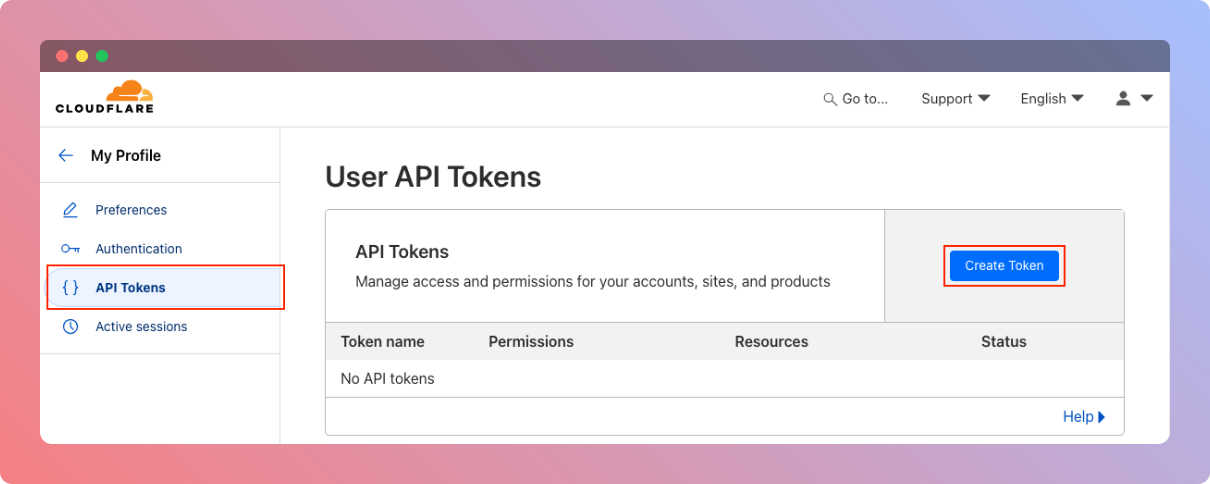
To create API Token to manage your Cloudflare infrastructure you need to go to My Profile -> API Tokens in your Cloudflare Dashboard. You can also you this link.
When you're there, you'll see all your current API Tokens and a button called Create Token, you need it.
Then you'll be asked, if you want to use already defined templates, or create custom one. We want to create custom API Token, so at the bottom of the page click Get Started button. After that you should see a Token creator, we'll need to specify as few access permissions as we can for it.
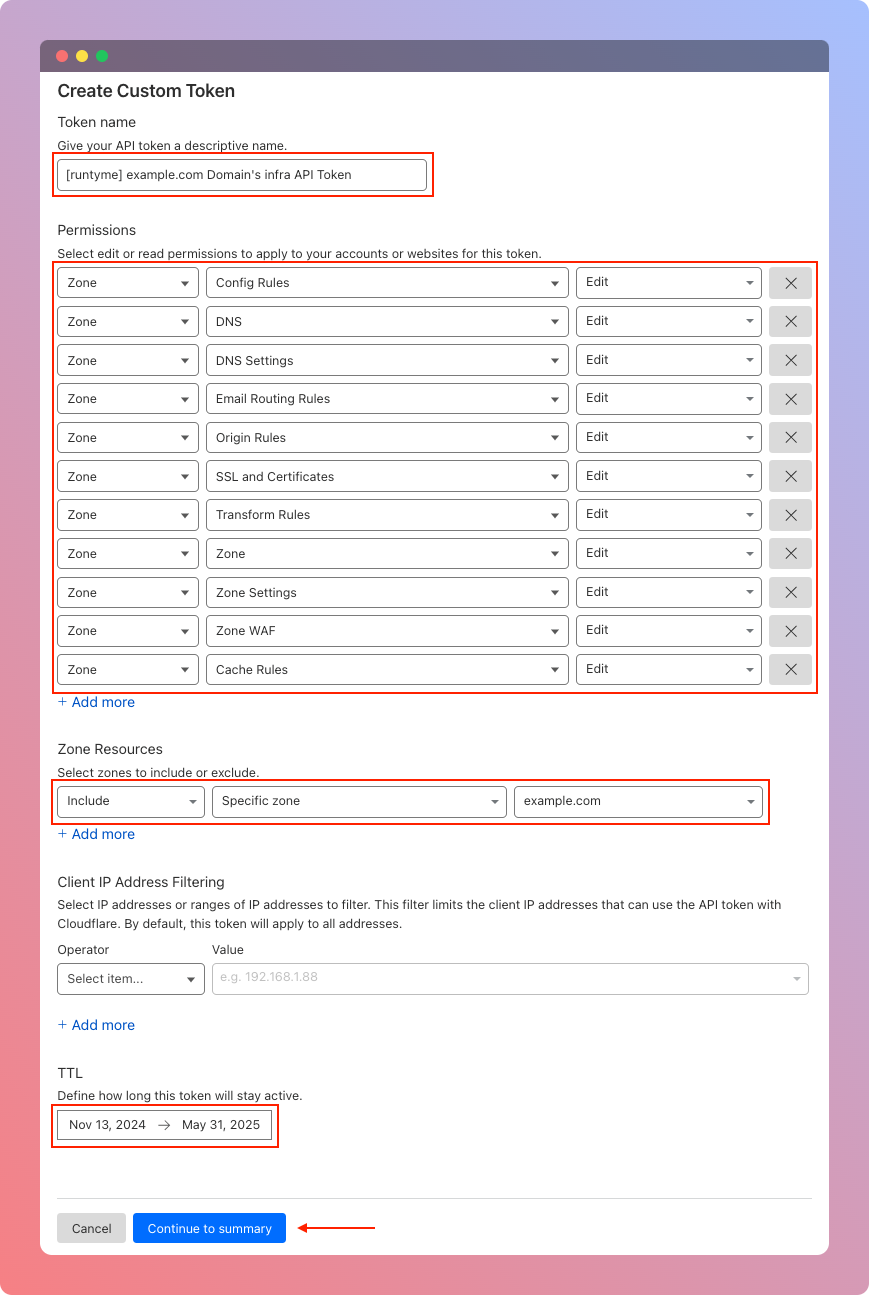
The values for Permissions that are necessary to make runtyme-kit work properly are:
Zone - Config Rules         - Edit
Zone - DNS                  - Edit
Zone - DNS Settings         - Edit
Zone - Email Routing Rules  - Edit
Zone - Origin Rules         - Edit
Zone - SSL and Certificates - Edit
Zone - Transform Rules      - Edit
Zone - Zone                 - Edit
Zone - Zone Settings        - Edit
Zone - Zone WAF             - Edit
Zone - Cache Rules          - Edit
Optionally, you can limit API Token access to a specific resource (domain), you'll need to use this values in Zone Resources section:
Include - Specific Zone - your-amazing-domain.com
And of course, you need to name this API Token with some descriptive value and specify for how long this token is valid, it's totally up to you. In the end it should look like this:
It is recommended to rotate secrets from time to time, so I encourage you to config this API Token to expire (TTL) after for example 6 months.
Make sure to save created API Token is safe place, where only you have access to it. Keep in mind we'll use value of this token in next steps.
How to get Zone ID?
Getting Zone ID of your domain is much more easier than creating API Token.
In your Cloudflare Dashboard pick domain that you're interested in, you'll be redirected to dashboard of this specific domain and at the bottom of this page, on your right, you'll see Zone ID value, which we'll be using in next steps.
If you have troubles finding this value, please refer to this guide:
Integrate with GitHub Actions
To use Cloudflare with runtyme-kit automated way, we'll have to add specific secret values in your project's GitHub repository, so GitHub Actions runner can pick them up and perform infrastructure updates on those specific resources.
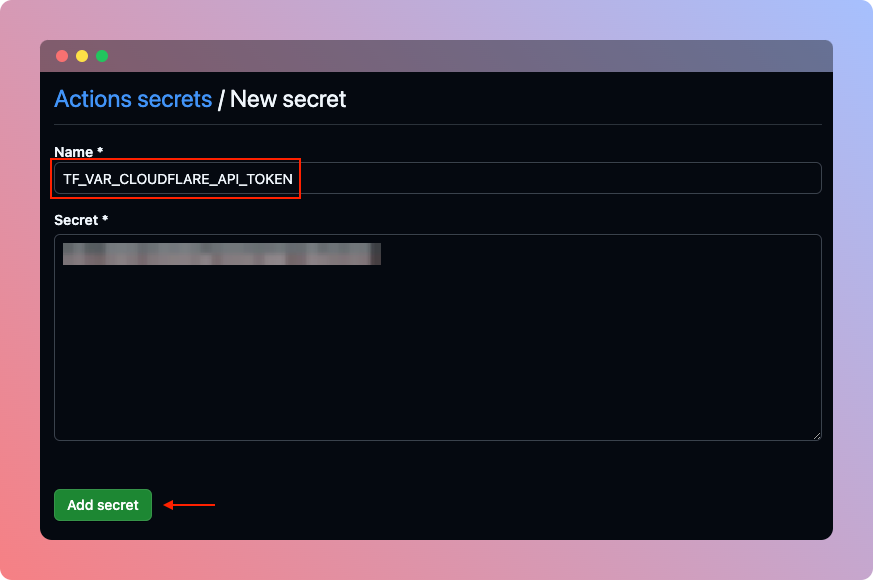
To add secrets to your GitHub repository, go to repository's Settings->Secrets and variables->Actions, under Secrets tab, click New repository secret button.
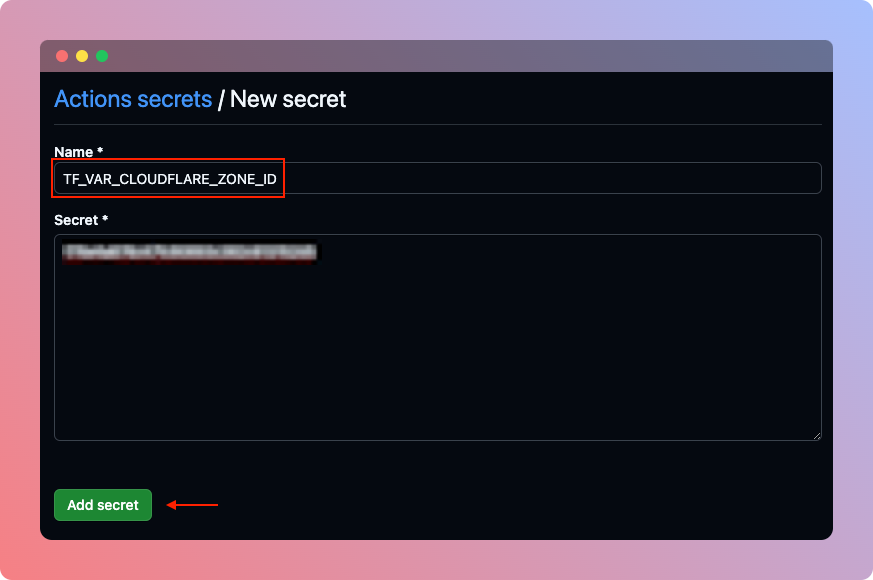
Following secrets must be added:
TF_VAR_CLOUDFLARE_API_TOKEN- Use value fromHow to get API Tokenstep.TF_VAR_CLOUDFLARE_ZONE_ID- Use value fromHow to get Zone IDstep.
Start using in with runtyme-kit
To get started with Cloudflare only couple of clicks will be needed. We'll need to define domain and subdomain for our DNS, configure CORS and finally enable Cloudflare module. You'll learn how to do it in this module, by following steps below. If you already know this, you can skip it and move to Reference section.
DNS
runtyme-kit's Cloudflare module will automatically create DNS records for your Backend and/or UI if you specify domain segment of infra/__env.tf file.
Domain segment consists of below field:
root- full name of your zone's domain, for example: my-amazing-domain.comsub.api- subdomain of your Backend service, for example if you use foo as a value withroot=example.com, your Backend will be accessible underfoo.example.comsub.ui- subdomain of your Frontend UI, for example if you use bar as a value withroot=example.com, your UI will be accessible underbar.example.comsub.docs- subdomain of your Documentation UI instance, for example if you use foofoo as a value withroot=example.com, your Docs will be accessible underfoofoo.example.com
Using @ value in either sub.api,sub.ui or sub.docs, will result in empty value, meaning that if you're using root=example.com, those will be accessed under example.com and www.example.com.
Only one subdomain can have @ as a value, using @ runtyme-kit will automatically create www subdomain for it and it will be accessible on either www.example.com and example.com.
locals {
    ...
    domain = {
        root = "example.com"
        sub = {
            api  = "api"  # -> api.example.com
            ui   = "ui"   # -> ui.example.com
            docs = "docs" # -> docs.example.com
        }
    }
    ...
}
Enable Cloudflare
To enable Cloudflare gateway, you only need to set cloudflare.enabled flag to true in your infra/__env.tf file.
For running Cloudflare, it is necessary to have domain segment defined in infra/__env.tf file, see above guide.
locals {
    ...
    cloudflare = {
        enabled = true
    }
    ...
}
This module has out of the box configuration, that takes care of all necessary security switches, toggles and configs. If you really need to customize it according to your needs, you'll need to dive into infra/modules/cloudflare/global code.
CORS
To call API from browser web application, it is necessary to configure CORS headers, otherwise all requests will be blocked due to security reasons. If you ever developed any Web Application, you are well aware of this little pain.
When developing API and UI locally, our Backend has CORS enabled for all incoming hosts, this will be rewriten on production by Cloudflare Transform rules, which are applied by runtyme-kit automatically
To enable CORS headers automatically, find cors section in infra/__env.tf file and switch cors.enabled to true. By default, all (*) incoming requests are accepted, you can (should) switch cors.allowed_host to accept requests only from your Frontend UI.
locals {
    ...
    domain = {
        root = "example.com"
        sub = {
            api  = "api"  # -> api.example.com
            ui   = "ui"   # -> ui.example.com
            docs = "docs" # -> docs.example.com
        }
    }
    cloudflare = {
        enabled = true
    }
    cors = {
        enabled      = true
        allowed_host = "ui.example.com" # <- `domain.sub.ui`
    }
    ...
}
Reference
locals {
    ...
    // (required if Cloudflare and/or CORS enabled)
    domain = {
        // (required) Your project's domain value
        root = "runtyme.co"
        // (optional) Subdomains for your deployed applications on which they'll be accessible
        // use '@' value, if it's root domain without any subdomain
        // example:
        //    - ui = "@" ---> runtyme.co
        //    - ui = "something" ------> something.runtyme.co
        sub = {
            // (optional) Subdomain on which your API will be accessible
            api = "api"
            // (optional) Subdomain on which your UI will be accessible
            ui = "ui-kit"
            // (optional) Subdomain on which your Docs will be accessible
            docs = "docs"
        }
    }
    cloudflare = {
        enabled = false
    }
    // (required if Cloudflare enabled)
    cors = {
        enabled = false
        // (optional) Specify CORS allowed hosts to block browser requests from unknown hostnames
        // Use '*' to allow all incoming traffic from browsers
        // default: '*'
        allowed_host = "*"
    }
    ...
}