Supabase (Postgres)
Prerequisites
To enable Supabase database, first you must have runtyme-kit pushed to the repostiory you've created in Get started step.
If you don't have it setted up yet, please go back to Get Started step. Otherwise:
- Make sure your repository has
TF_ENABLEDenvironment variable set totrue, if not follow Installation step. - Make sure your Infrastructure Backend is configured (
TF_BACKEND_PG_CONN_STRexists), if not follow State Management step. - Signup to Supabase here if you don't have an account yet.
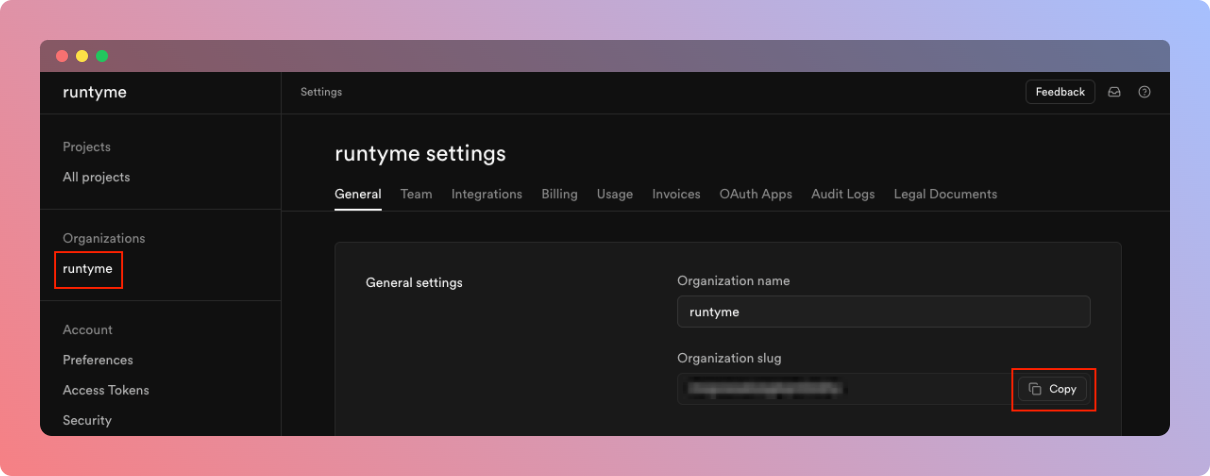
Get Organization ID
If you go your dashboard after signing in. you'll see your organizations on the left side bar. Pick yours and copy Organization slug. That's it.
Get Supabase API token
In order to create and configure resources in Supabase, we need admin account API token. Once signed in you need to create one in your account dashboard.
Under Account/Access Tokens in your Supabase dashboard, you'll see Generate new token button, click it, you'll be prompted for a name for this token. Name it however you want.
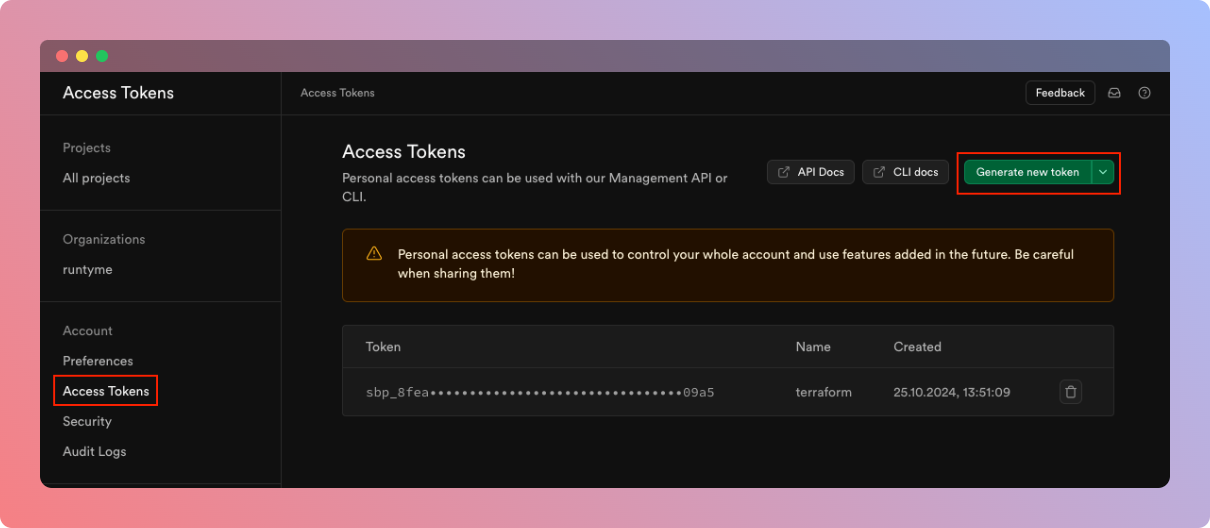
When generated, you'll see green box with the value of your token.
Make sure to copy it and save it securely, because you'll never see this value in Supabase again.
GitHub Actions
Your CI/CD runner will use Supabase API token as secured secret environment variable to orchestrate Supabase changes. It'll also use organization id to identify where to put your project.
- Go to your repository's Settings tab, under
SecurityclickSecrets and variables->Actions - Click
New repository secret, name itTF_VAR_SUPABASE_ACCESS_TOKENand paste the API token you've created as a value. - Click
New repository secret, name itTF_VAR_SUPABASE_ORGANIZATION_IDand paste the organization identifier (slug).
Configure __env.tf
You'll be configuring whole Supabase project just from one file, which is infra/__env.tf. In this file you'll find plenty of disabled yet already configured resources, but in this guide we'll be looking at supabase under Persistence segment.
- To enable
supabaseresource, you need to switchenabledflag totrueand specifyproject_name. - It is recommended to also specify
regionbut it is not required, default value would beeu-central-1. Available values can be found here. - (non free tier) If you're not running on free tier, your can also specify
sizeof the instance. Free tier is alwaysnano. Available values can be found here.
locals {
    ...
    supabase = {
        enabled      = true
        project_name = "[YOUR_PROJECT_NAME]"
        region       = "eu-central-1" // defaults to "eu-central-1" if not set
        # size         = "nano"       // this value is only allowed on non-Free tier, if you're running on higher plan, you can uncomment this
    }
    ...
}
When you make desired changes, push the code into the repository (create Pull Request or push it directly to default branch, it's up to you) and you should see Action Job being executed. Make sure to validate scheduled changes to your infrastructure, or potential errors.
All secrets and variables associated with Supabase (i.e. Postgres URI), will be automatically attached to the running application (if heroku.enabled = true)
Custom SQL functions
It is possible to define your custom SQL function to be ran against your Supabase instance. In fact runtyme-kit already has some functions defined i.e. get_user_id_by_email.sql.
Custom SQL functions must be:
- placed under
infra/modules/supabase/sqldirectory - written in
plpgsqllanguage syntax - included in
locals.sql_scriptsfield ofinfra/modules/supabase/locals.tffile (fn_name => filepath)